All orders placed between 5/3/2026-5/10/2026 will ship on 5/11/2026!
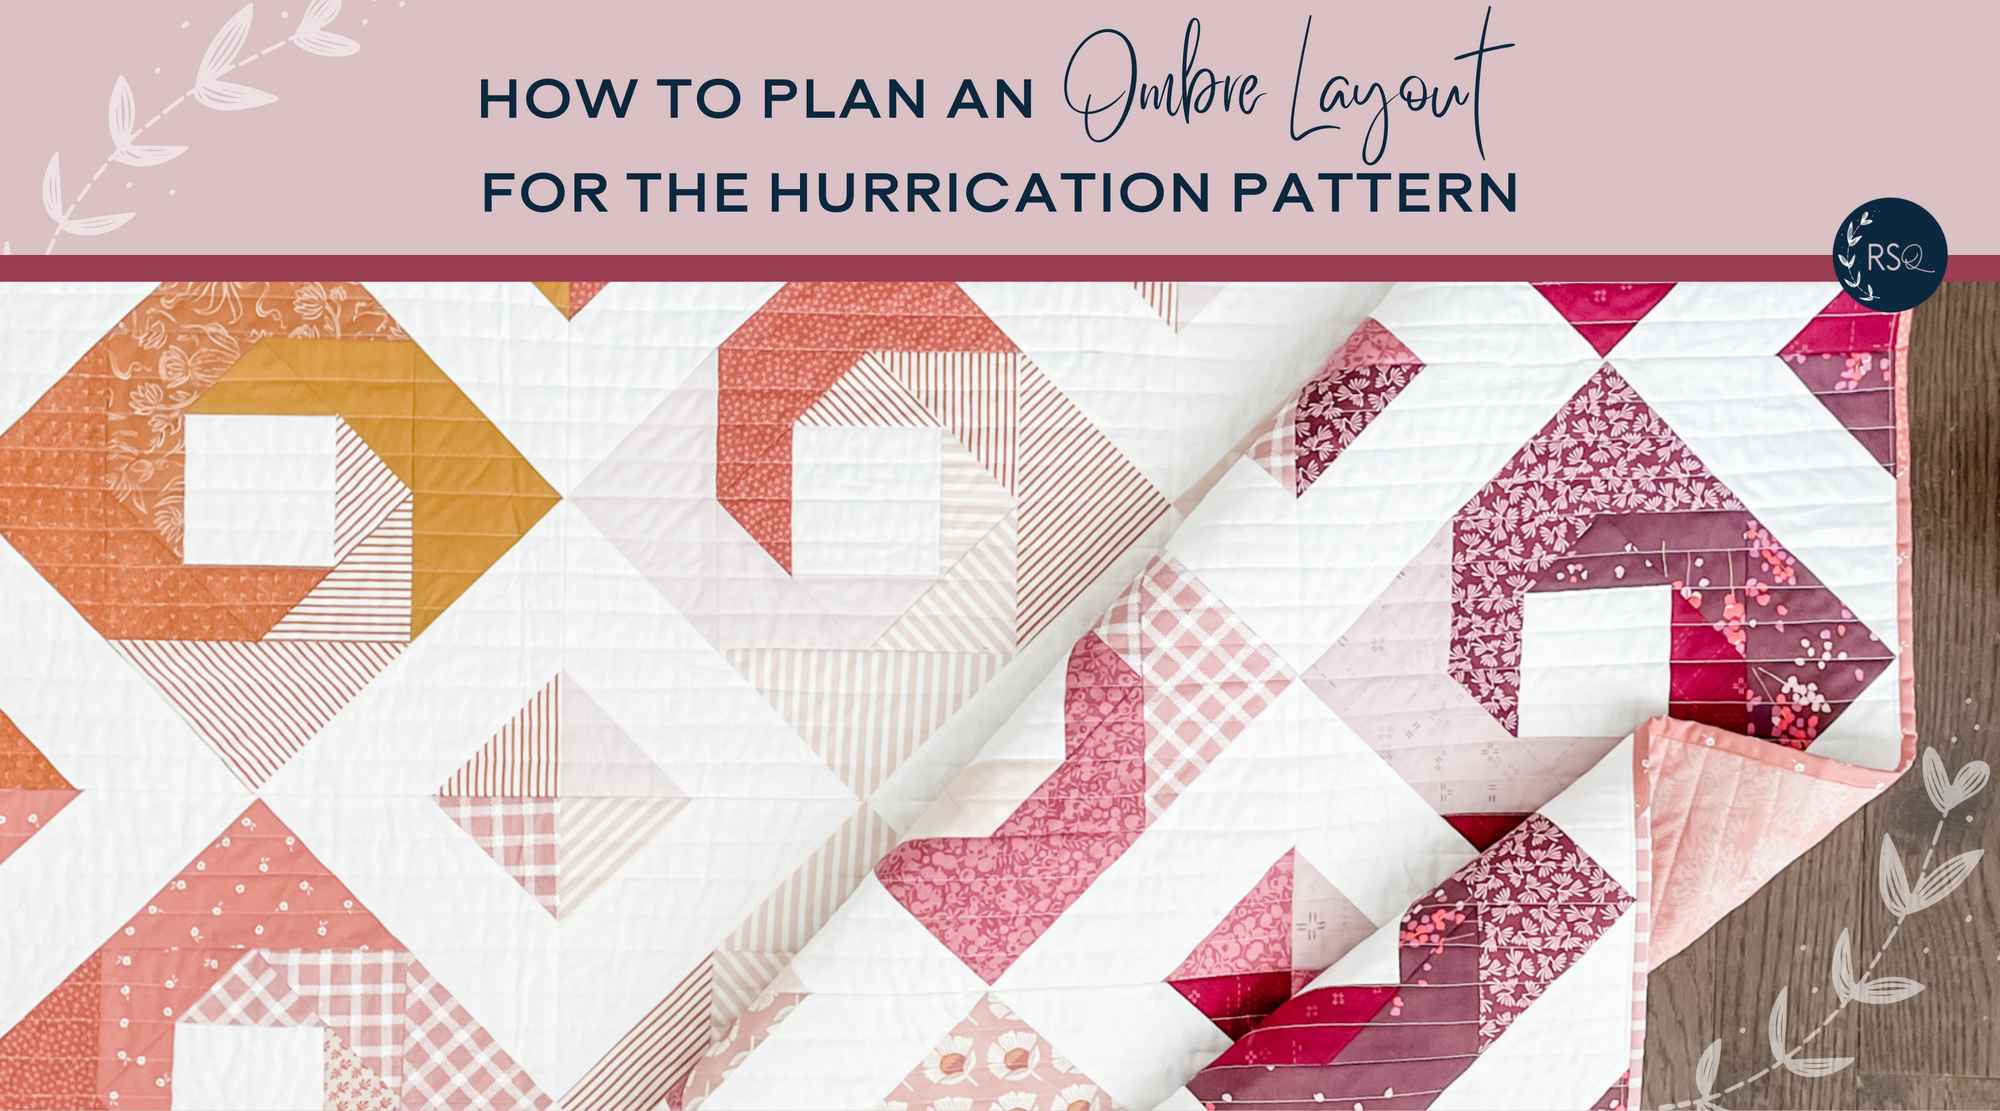

Planning the ombre/color shift in the Hurrication pattern took a little extra brain power due to the way the fabrics rotate within each block. But, let me tell you, the end result was 100% worth it. This might be my favorite quilt I've ever made.
I'm going to tell you exactly how I planned my quilt so that you can make something similar (you will need the pattern to actually make this quilt, you can get it here)!

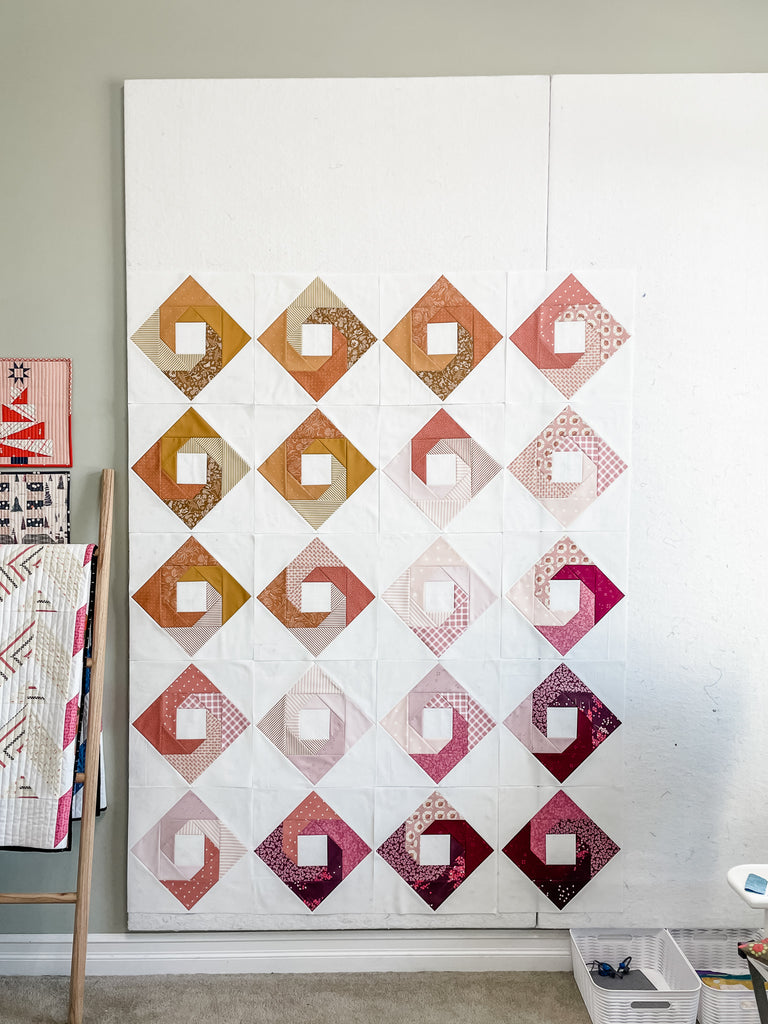
First, I laid out the D squares (that will become the corners of the blocks) in sets of four to plan the color shift. Once all of the blocks were laid out, I moved and rearranged to ensure that each block had a different combination of fabrics while still maintaining the color shift. Last thing I did in this step was to label each set of squares that represented one block. Also, I left these blocks in place while I was making each block. One, to help ensure I was sewing the right pieces together, and two, to make sure I liked the color shift as I kept looking at it.

Then, I started sewing my blocks together following the block assembly on page 4. BEFORE I added the background fabric, I reevaluated the color shift. At this stage, it was still looking pretty good. I moved or rotated one or two blocks to keep the color shift smooth.

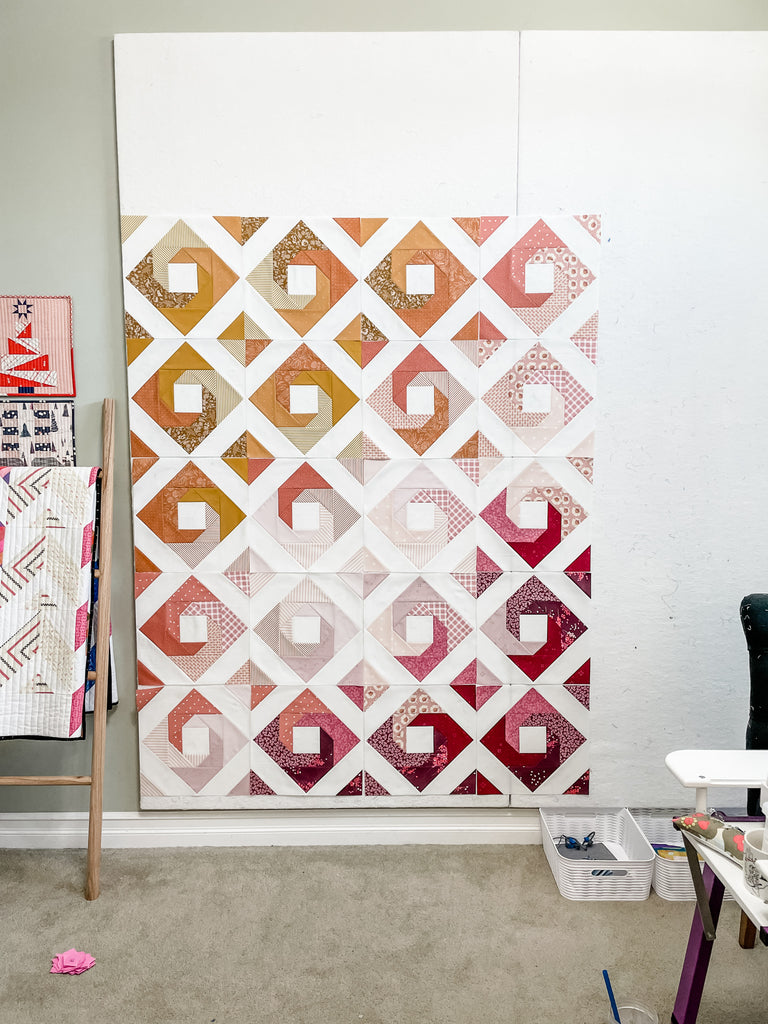
After adding the background fabric, I evaluated the color shift for the last time. Because of the way the fabric rotate after adding the background fabric, this step is when I made the most changes. I swapped one or two blocks, but I spent some time rotating (and then rotating them back) to find the most visually appealing layout.
During this step, I take a picture of every single layout. Even with the blocks up on my design wall, sometimes it is easier to see in a picture. I will also make the picture black and white to see if there are any glaring errors in the color shift.
The last step is to add the D square corners. In the pattern, I have the snowballed corner in the opposite corner of the same color B triangle in the block. However, in this ombre version, I put the D square in the SAME corner as the B triangle. This change helped keep the flow.
That's it! A little bit of planning up front, and working block by block instead of chain piecing was worth all the effort after seeing the result. I love this quilt so much!
I made this color key for my quilt for you to use as a starting point. Depending on your color flow and the fabrics you have, you will probably need to tweak things, but you can use this to get going!

You can get the Hurrication pattern in PDF or PAPER pattern in my shop!

|
Want a cute Hurrication sticker? You can get yourself one here! |
 |


