All Printed Patterns Are Now BACK IN STOCK!
Log in
Cart (
0
)
Checkout
Home
About
My Book
Shop
PDF Patterns
Printed Patterns
Book
Kits & Bundles
Quilt Kits
Fabric Bundles
Notions & Gifts
Handmade Quilts
Fabric Destash
Blog
Scrap Management
Tutorials
Color Inspo
Wholesale
Contact
riley blake designs
Chevron Points
quilt pattern
riley blake designs
Chevron Points Quilt - The Daybreak One
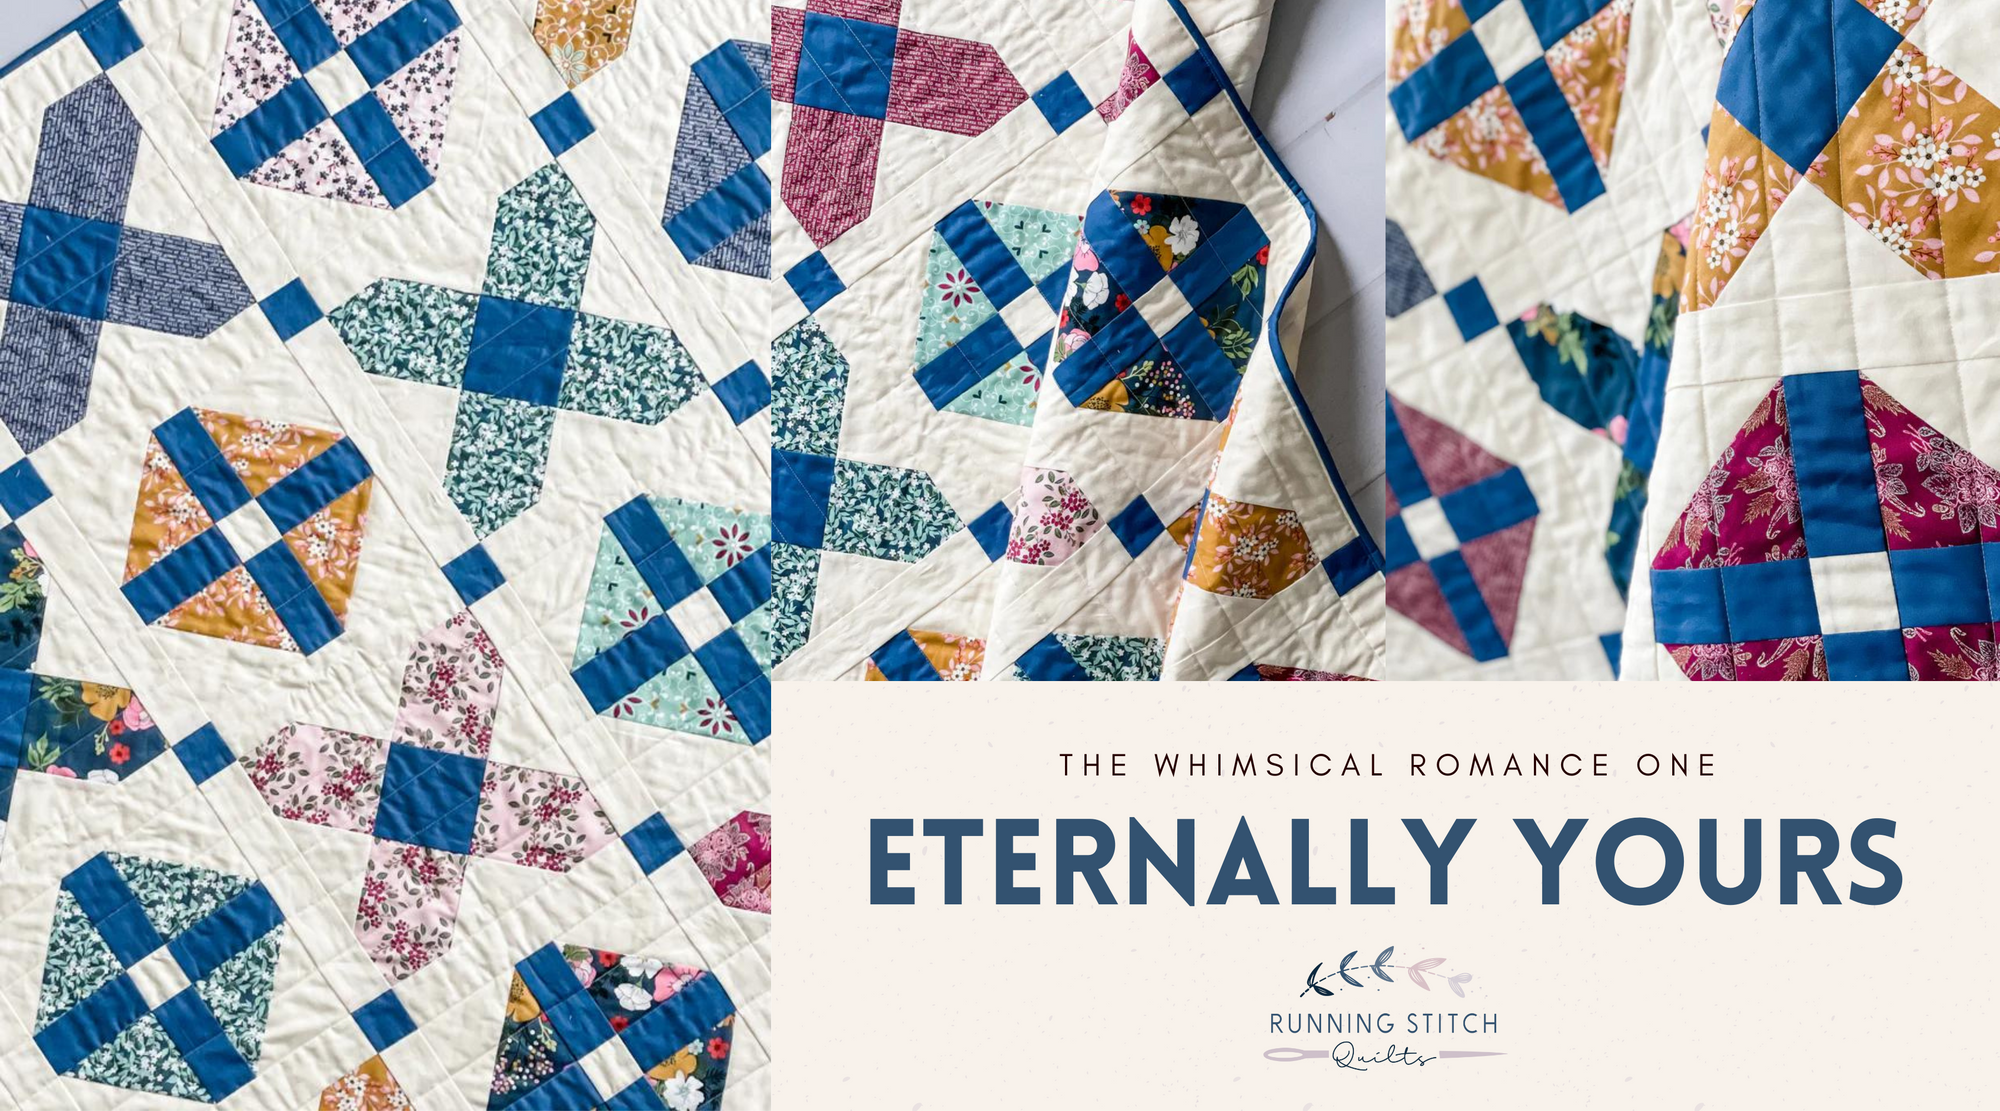
Eternally Yours
quilt pattern
riley blake designs
Eternally Yours Quilt - The Whimsical Romance One
Mountain Valley
quilt pattern
riley blake designs
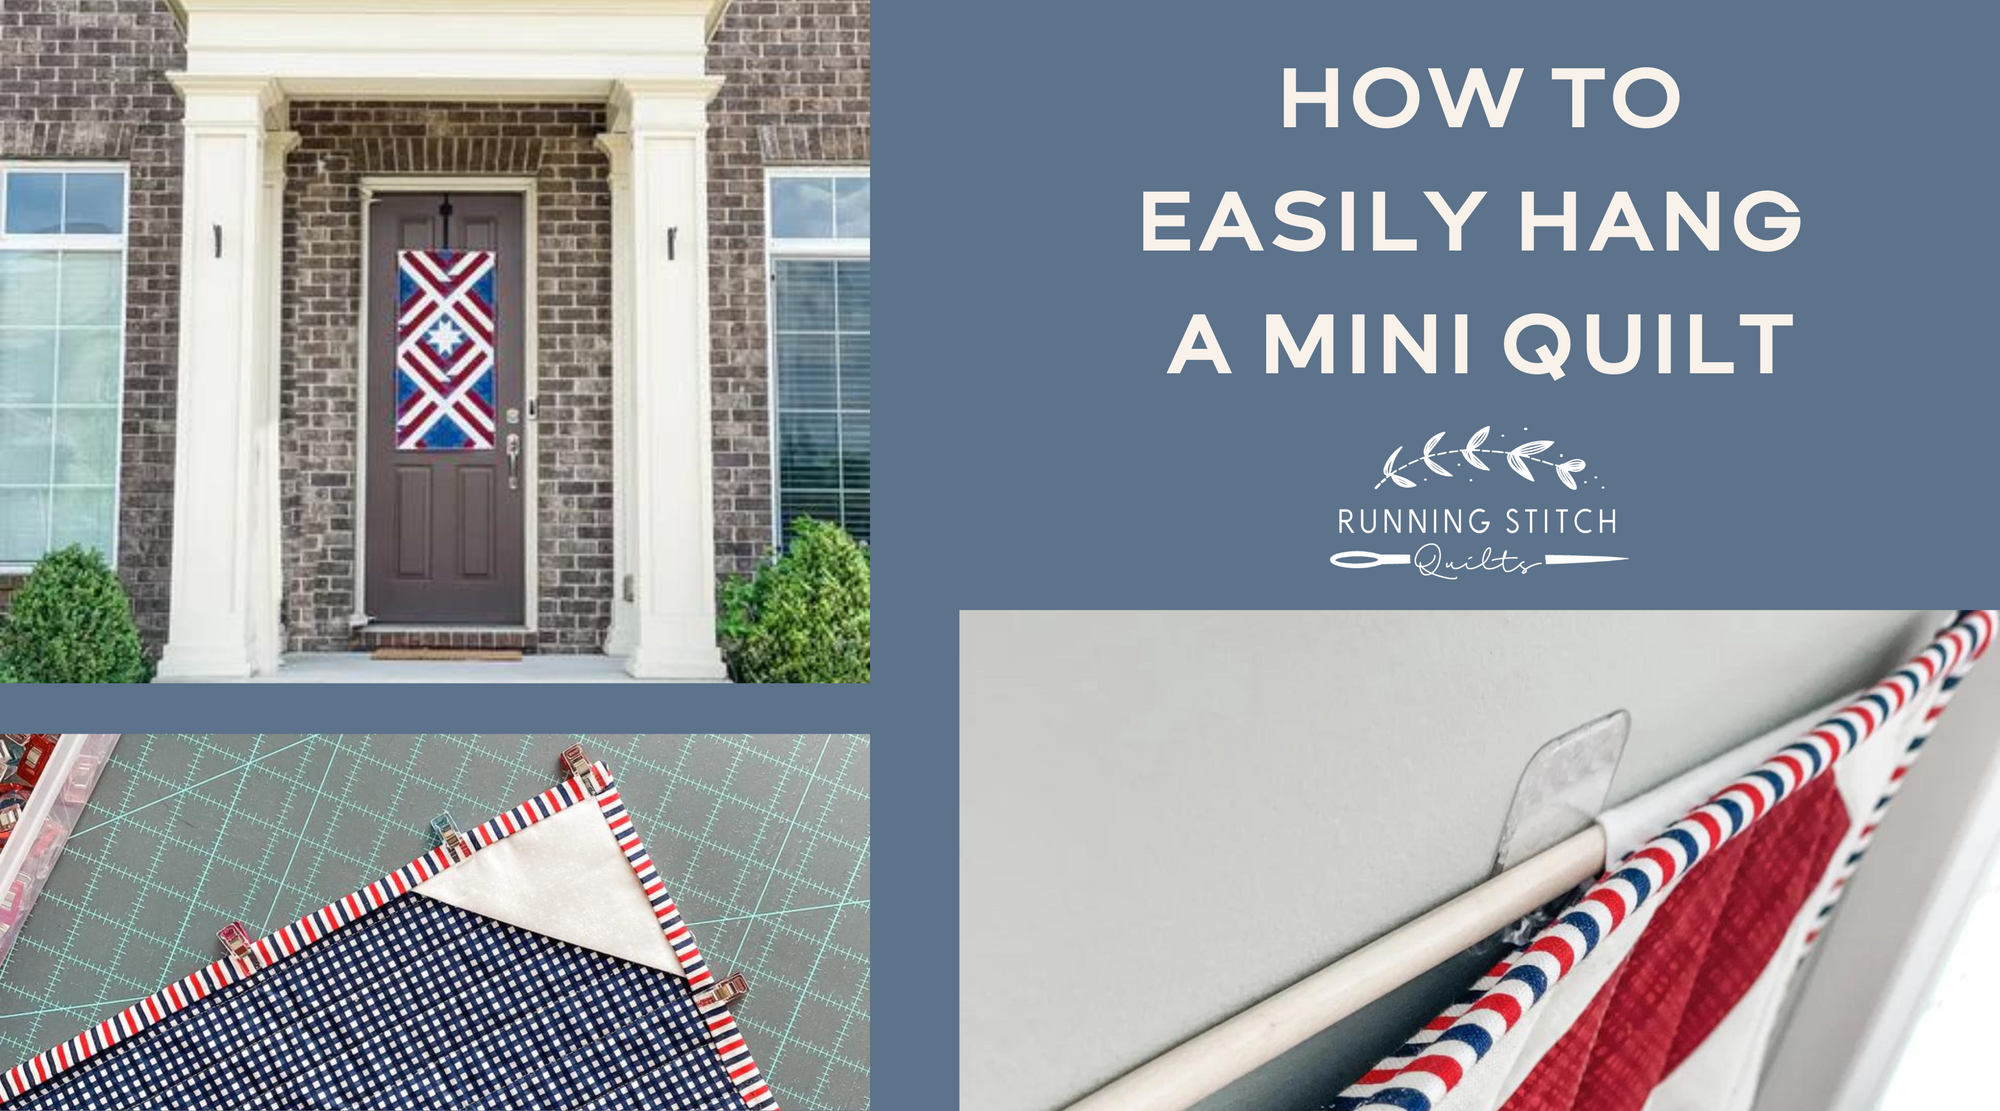
tutorial
How to Easily Hang a Mini Quilt
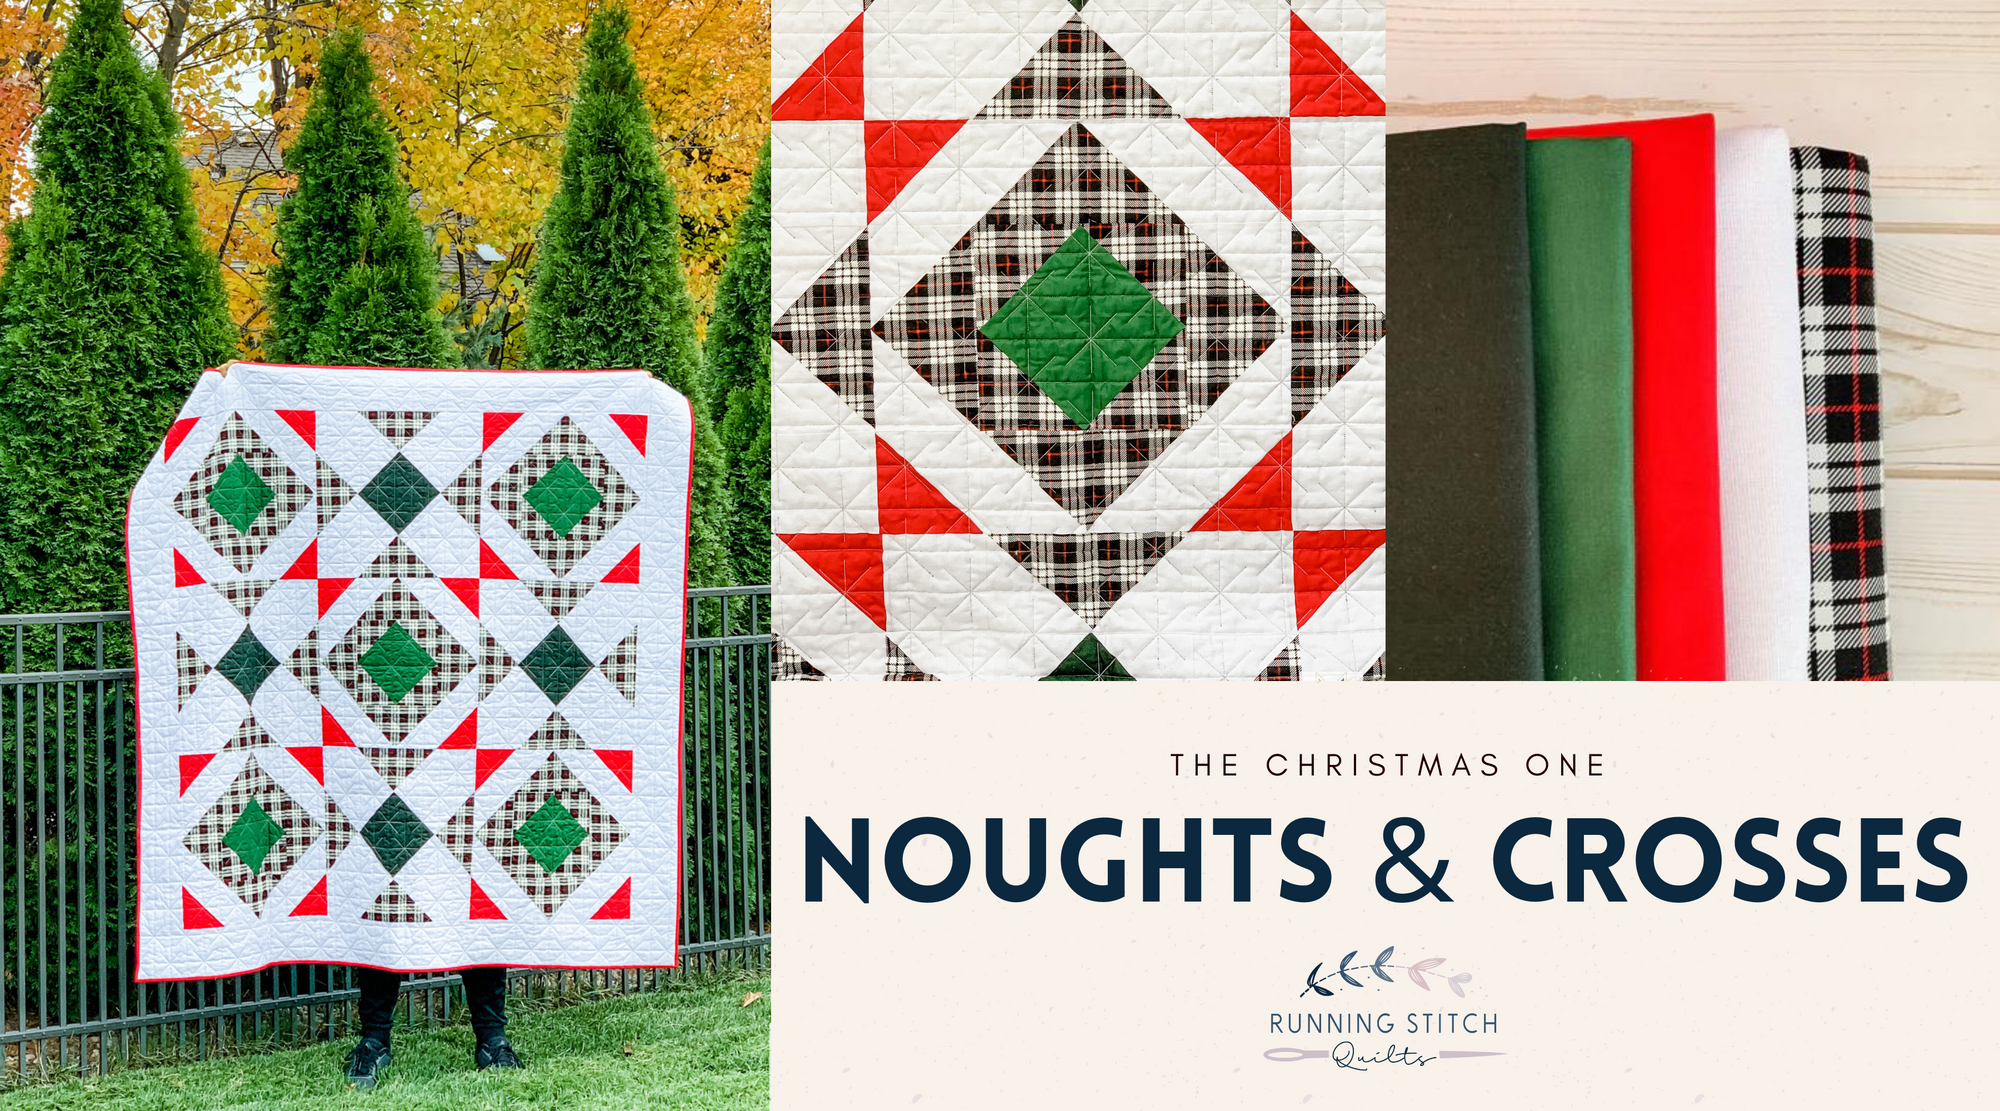
Noughts and Crosses
quilt pattern
riley blake designs
Noughts and Crosses - The Christmas One
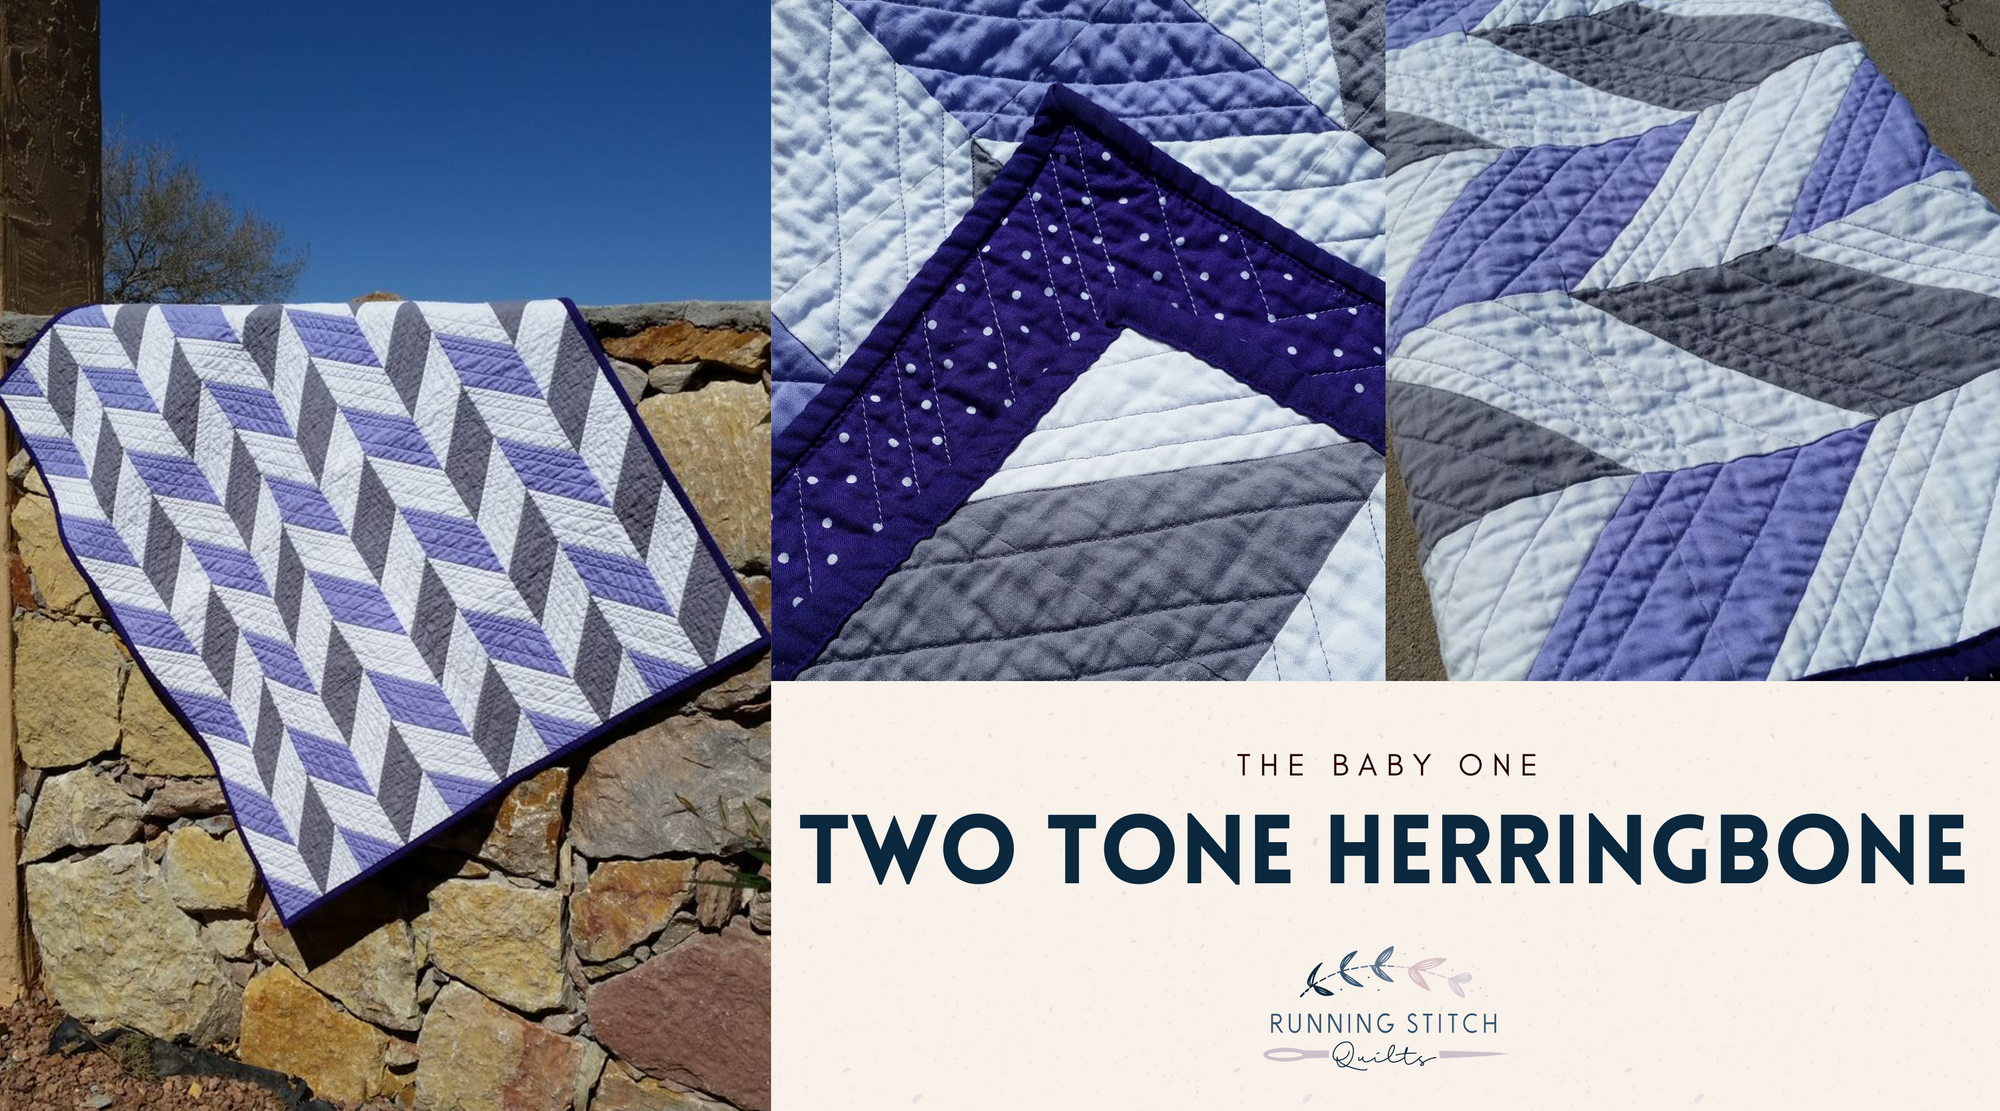
baby
quilt pattern
riley blake designs
Baby Cowboy Quilt
quilt pattern
riley blake designs
robert kaufman
solids
Two Tone Herringbone Baby Quilt